Previously a production blog for my final year project ( you can still find the old posts of WIP images) YOu have stumbled across a collection of knick knacks and tutorials for 3D CG...

Friday, January 29, 2010

physical sun sky

Using Sun and Sky in Mental Ray with Maya


Application Used: Autodesk Maya

Author: Bogdan Amidzic

Contact:the@cavz.com

Author Website:http://www.cavz.com/


Using Sun and Sky in mental ray


With Maya 8.5 mental ray's got some new fancy options and modes. One of them is the Sun and Sky system. I'm going to guide you through some of new features.


Create a simple terrain and some object on it. I've created a high-tech tower, but you can make whatever you want -- just add some small details because I'm going to show you how to make them more obvious.


For starters, you'll need to load mental ray. To do that, go to window/settings preferences/plug in manager. Enable Mayatomr.mll


In render globals, choose mental ray. In mental ray globals, you can see the environment tab. Hit Create Physical Sun and Sky.


In the attribute editor, mia_physicalsky1 will appear. There are menu options, I'm going to show you only the few most important ones.


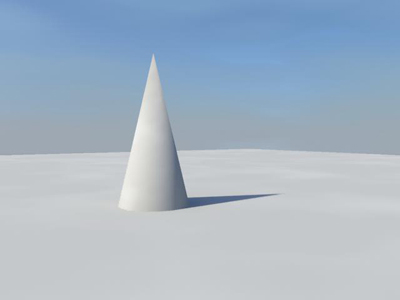
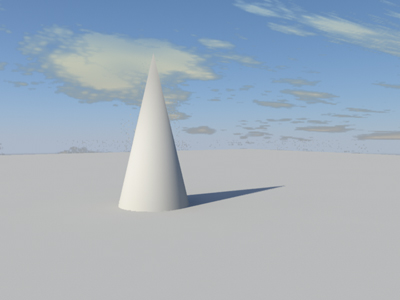
Also there's directional light in the scene. This light controls the direction of the sun and also the time.


If you render, you'll get something like this.


In quality presets, choose previewFinalGather. This will set sampling slightly higher than draft.


On sunDirectionShape, in custom shaders tab, you'll see that light has a light shader, and photon emitter connected.


Mia_physicalsun defines the sun itself. Samples define the number of rays used for shadows. Increase this number if there's noise in shadows.


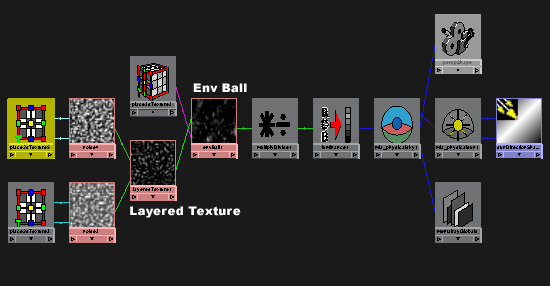
In the hypershade, you can see all of the shaders used in the Sun and Sky system. There's mia_exposure_simple1 applied as lens shader on camera. This node remaps colors to the way human eye sees. In mental ray all intensities are in linear space. Human brain sees color in a different way. Basically it's a logarithmic function. That's why gamma is 2.2. That's the way we see, same thing for all photographs. So if you apply texture to objects you will get something like this:


It's washed. Why? Because texture has gamma 2.2. The way we see it. So mental ray uses texture with gamma 2.2 in linear calculations of light intensity and then it converts it to gamma 2.2 so we can see it right. So gamma 2.2 is applied twice. That's why the texture is washed. How are we gonna fix it? Simple -- use the gammaCorrect node. Apply gamma 0.454 to image. In that way it gets linear. Then renderer applies gamma 2.2, and it looks good.


In new mental ray, there's also a new shader called mia_material. It's a shader with lots of options, like glossy reflections, built in ambient occlusion, interpolation optimizations鈥?


Apply that material to the tower.


Apply texture with gamma correction.


Also set reflectivity to 0. We are not going to use it in this tutorial.


Also one more important thing about new mental ray. Final Gather has new options -- now it works pretty well with low accuracy settings (same as rays in earlier versions), point density defines how big the Final Gather radius will be. With 50, 0.1 results can be pretty nice and fast.


The thing I wanted to show regarding the mia_material is built-in ambient occlusion. So now final gather is used to get overall ambient lighting and ambient occlusion will darken corners, so details will appear. Ambient occlusion has a few options. Rays define accuracy; raise it if you have noise. Distance defines how far mental ray will try to find occluding geometry.


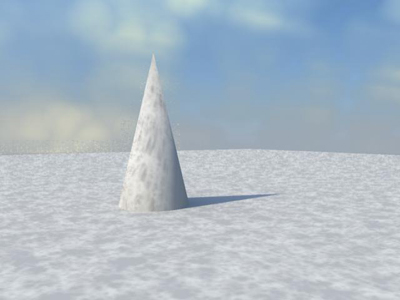
So without ambient occlusion..


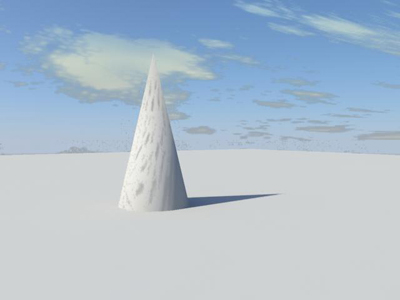
And with ambient occlusion.


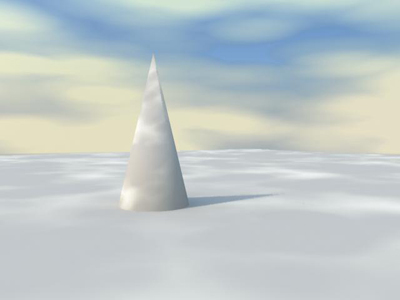
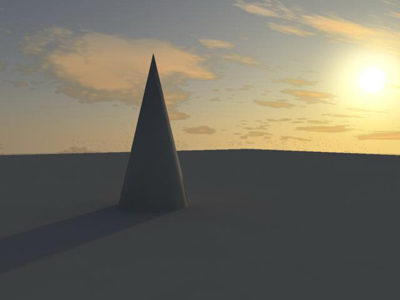
Also in mia_physicalsky, there's a haze attribute. Raise it to get foggy diffused lighting.


Red/Blue shift attribute controls the balance between blues and reds. Negative values mean more blue and positive more red.


physical sun

Animated clouds with mental ray Physical Sky – Tutorial

In general the trick is to add the clouds (either an image or a node) to the physical sky “Haze” value as Master Zap indicated in his blog.


To achive that in Maya you will need the following.
Maya nodes = noise, multiplyDivide and luminance.

Connect as follow
noise out color > multiplyDivide input
multiplyDivide output > luminance input
luminance out value > mia_physicalsky haze.

netwrok.jpg

The noise node will serve as the clouds in the sky, which can be animated easily.

Once rendered you will hardly notice any clouds.
clouds001.jpg

This where the multiply/divide nodes comes in.
Increase “Input 2″ to be 20, 0, 0
Now you will have more prominent clouds.


Since the haze parameter accept only ONE value.
The RGB > Luminance node can be useful in this connection, since it will convert the 3 out values of RGB to 1 value which is luminance.

clouds002.jpg

In the Noise node, you can animate the time value to get the animated clouds in your render.

Note: The Noise node can be replaced with a texture file or any other Maya nodes.

To achieve more realistic result, add an envBall node to the shading network, this will give the sky roundness effect rather than just a flat image.

clouds003.jpg

From here you can start building more complicated network to get more realistic look.

clouds0041.jpg


netwrok2.jpg

Note: to get rid of these artifacts that you see on the cone object, one needs to examine the network connection closely.
The clouds were connected to the “haze” parameter, however that “Sky haze” is already connected to the “Sun haze”

netwroksun2.jpg
Once this connection is broken, the artifacts will disappear, however you will need test it since this test was made on a simple scene and it might have a side effect in an actual production file.

clouds005fx.jpg

The following image reminds me with Alias Power Animator Sky system.
If you know what I’m talking about , then you are old. :)


clouds005.jpg

Note:

Thursday, January 7, 2010

Another photoreal tutorial

Making of Male Green Frog

Author: Massimo Righi

Software: Autodesk Maya

Author Website: http://www.massimorighi.com/

Making of Male Green Frog By Massimo Righi

Hi, my name is Massimo Righi and I am a freelance CG artist from Italy.

What I'm going to do is try and show you the main steps of how I made my "Male Green Frog" image. I used Maya 8 for modelling, MentalRay for rendering and Photoshop for the textures.

The goal for me was to not only create a photo-realistic render, but also a 3d model for animation purposes, without the use of ZBrush (or similar software) and without adding any kind of post-work to the final render.

The first thing was to do some research to find some good references, having in mind the final result I wanted to achieve. I wasn't able to find all the views of the same frog that I wanted, so I mixed a lot of different frogs in order to model the main shape.

Making of Male Green Frog By Massimo Righi

I started building the low-poly frog using a simple polygon plane and extruded the edges following the reference pics. I then modelled the main body leaving holes where the legs were to be connected.

Making of Male Green Frog By Massimo Righi

After that, I created the legs and then joined them to the body.
Making of Male Green Frog By Massimo Righi

As you can see from the WIP pic below, I've built only half of the frog so that I had only half of the UV map to deal with.

Making of Male Green Frog By Massimo Righi


Making of Male Green Frog By Massimo Righi

For the main (half) body and the leg, I made 2 cylindrical maps and for the feet I used 2 planar maps: 1 from the top view and one from bottom view. I used a simple checker applied to a lambert shader for checking the overall process while tweaking the UVs.

After that, I duplicated the half and combined everything together, ending up with 1.960 polygons, which is quite good for the low poly model (this then can be used as a cage for the rigging/animation process).

I than duplicated the frog keeping the low model in another layer, and then made the higher poly version (about 30.000 poly) doing a polysmooth. Finally, I added some details using the Maya sculpting tools, trying always to follow the main reference.


Making of Male Green Frog By Massimo Righi

Using photos and freehand (I used a Wacom tablet), I made the textures in Photoshop each 2048x2048. Then I applied the texture to the frog, but I did notice (I was expecting that ) that some of the texture seams needed to be adjusted. So I used the built-in Maya 3d paint for that, using the clone tool.

When the color texture was made, I created the specular, bump and diffuse maps from it.

Making of Male Green Frog By Massimo Righi

Making of Male Green Frog By Massimo Righi

Now was the time for setting up the scene. I created a simple plane where I placed the frog and rotated it about 17° (I've done the same for the frog too). For the plane texture, I used a photo made by me and cropped it to about 1300x900... then I made the bump.

Making of Male Green Frog By Massimo Righi

I created a camera and enabled the depth of field on it. As you can see from the grab, I made a distance tool placing one locator in the point of focus on the model and the other locator in the camera lens. I than parented that locator to the camera so that when I was moving the camera, the dimension value was also changing.
Making of Male Green Frog By Massimo Righi

Before working on lighting, I made the shader networks; one for the main frog and one for the eyeballs. After some render tests, I decided to use a blinn shader with a Translucence value=1 for both.


Making of Male Green Frog By Massimo Righi

For the lighting setup, I used an HDRI probe and 3 lights: 1 point-light (raytrace shadow) and 2 spotlights.

Making of Male Green Frog By Massimo Righi

Making of Male Green Frog By Massimo Righi

For the MentalRay render settings, I used a mitchell filter with a sample level min=1 max=3, Ray tracing and Final-Gather.

Making of Male Green Frog By Massimo Righi

Here is the final render of the frog.

I want to thank all of you for reading, and hope that it will be helpful in some way.

Making of Male Green Frog By Massimo Righi